![[SwiftUI] Naver Map 처음 위치, 현재 위치, Maker](https://img1.daumcdn.net/thumb/R750x0/?scode=mtistory2&fname=https%3A%2F%2Fblog.kakaocdn.net%2Fdna%2Fb0xHPC%2FbtrM38b2VBC%2FAAAAAAAAAAAAAAAAAAAAAO19p14Oh3-8miXADu-rBkZKEvwMdhACZUQBr0U-lFVb%2Fimg.png%3Fcredential%3DyqXZFxpELC7KVnFOS48ylbz2pIh7yKj8%26expires%3D1772290799%26allow_ip%3D%26allow_referer%3D%26signature%3DKjOhypzDaVXZJhQS0dHmHwXXmPg%253D)

2022.09.20 - [Swift] - [SwiftUI] Naver Map iOS install
[SwiftUI] Naver Map iOS install
프로젝트에서 지도 앱을 사용하고자 Naver와 Kakao를 고민하게 되었고, iOS의 경우에는 Kakao 보다는 Naver에 대한 내용의 차이가 있었기에 (swift 지원을 했던 시기의 차이) Kakao에 대한 것보다는 Naver를
raidho.tistory.com
이전 글을 통해서 네이버 지도를 띄워봤으니 처음시작 되는 위치와 현재 위치 그리고 Maker까지 표현을 하고자 합니다.
// MapView.swift
struct MapView: View {
    @State var coord: (Double, Double) = (37.5766905, 126.9769307)

    var body: some View {
        ZStack {
            UIMapView()
                .edgesIgnoringSafeArea(.vertical)
        }
    }
}

struct UIMapView: UIViewRepresentable {
    var coord: (Double, Double)
    // ...

    func updateUIView(_ uiView: NMFNaverMapView, context: Context) {
        let coord = NMGLatLng(lat: coord.0, lng: coord.1)
        let cameraUpdate = NMFCameraUpdate(scrollTo: coord)
        cameraUpdate.animation = .fly
        cameraUpdate.animationDuration = 1
        uiView.mapView.moveCamera(cameraUpdate)
    }
}
이전 글에 이어서 코드가 진행되어 추가된 코드만 올렸으나, 전체 코드는 해당 글 하단에 있습니다.
NMGLatLng를 통해서 좌표(latitude 속성은 위도를, longitude 속성은 경도)를 업데이트 시켜주고,
NMFCameraUpdate를 통해서 카메라 시점을 변경하도록 합니다.
NMFCameraUpdate : 지도를 바라보는 카메라의 이동을 정의하는 클래스로 생성한 인스턴스를 파라미터로 삼아 NMFMapView의 -moveCamera:를 호출하면 지도를 이동할 수 있습니다.

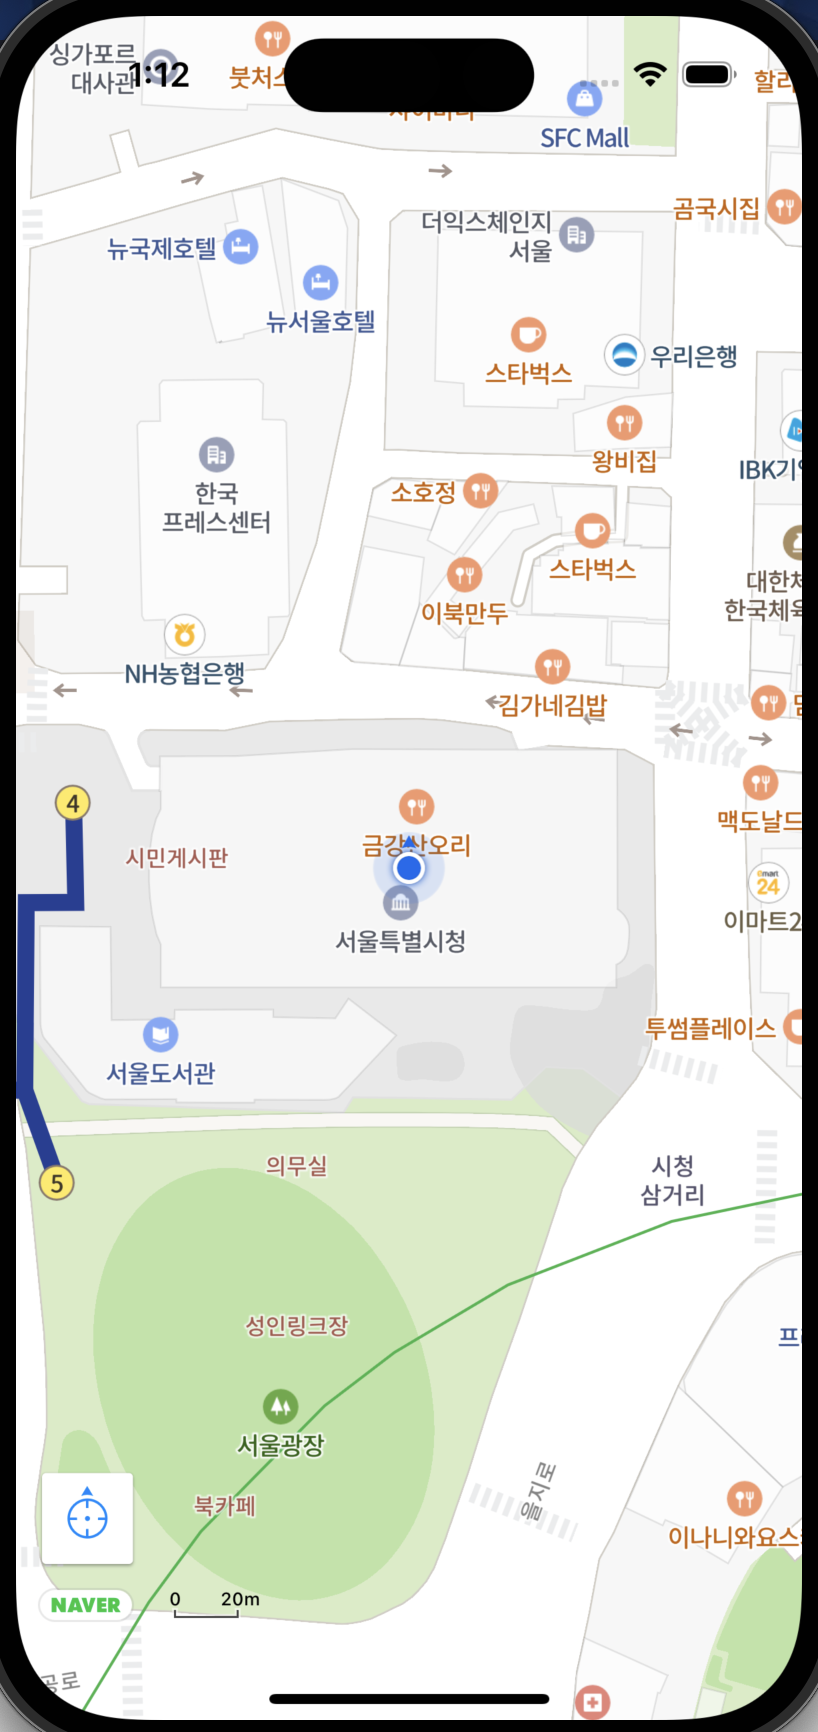
시작과 동시에 fly 효과의 애니메이션이 시작되면서 맵 화면이 전환되는 것을 볼 수 있습니다.
이제 현재 위치에 대한 내용을 설명하겠습니다.
// MapView.swift
struct UIMapView: UIViewRepresentable {
    var locationManager = CLLocationManager()
    var coord: (Double, Double)

    func makeUIView(context: Context) -> NMFNaverMapView {
        // ...

        locationManager.requestWhenInUseAuthorization()
    }

    // ...
}
CLLocationManager : 앱에 대한 위치 관련 이벤트 전달을 시작 및 중지하는 데 사용하는 개체로 앱에서 하나 이상의 위치 관리자 개체를 만들고 위치 데이터가 필요한 곳에서 사용합니다. 위치 관리자 객체를 생성한 후 Core Location이 위치 변경을 보고하는 빈도를 알 수 있도록 구성합니다.
requestWhenIsUseAuthorization : 이름에서 알 수 있듯이 앱 사용 중에 위치 서비스를 사용하기 위해 사용자의 권한을 요청합니다
그리고 Info.plist 에도 위치 권한 요청 메세지를 기입하도록 해야합니다.
Key에는 Privacy - Location When In Use Usage Description 그리고 Value 에는 문구를 입력하면 됩니다.
여기까지 되었다면 시뮬레이터에서 권한 요청을 허락 후, 현재 위치 나타내는 버튼을 사용할 수 있게 됩니다.

하지만 여기서 문제가 발생하게 되는데, 시뮬레이터에서는 직접 현재 위치를 수동으로 입력을 해야만 합니다. 시뮬레이터가 실행되고 나서, Features -> Location -> Custom Location 에서 위도와 경도를 입력하면 됩니다. 위도는 37.56668, 경도는 126.978415로 입력하게 되면 서울시청에 위치하게 만들어집니다.

그리고 Maker 지도에서 내가 원하는 곳에 표시를 하도록 해보겠습니다.
func makeUIView(context: Context) -> NMFNaverMapView {
    // ...

    let marker = NMFMarker()

    marker.position = NMGLatLng(lat: 37.5666805, lng: 126.9784147)
    marker.iconImage = NMFOverlayImage(image: UIImage(systemName: "wifi.circle.fill")!)
    marker.captionText = "wifi"
    marker.iconTintColor = UIColor.systemIndigo
    marker.width = CGFloat(NMF_MARKER_SIZE_AUTO)
    marker.height = CGFloat(NMF_MARKER_SIZE_AUTO)
    marker.mapView = view.mapView
}
NMFMarker를 이용해서 일반적인 클래스 객체처럼 생성할 수 있습니다. 객체를 생성하고, position 속성에 좌표를 지정한 후, mapView 속성에 지도 객체를 지정하면 마커가 나타납니다. 단, mapView를 지정하기 전에는 반드시 position을 지정해야 하며, 그렇지 않으면 마커가 지도에 추가되지 않습니다.
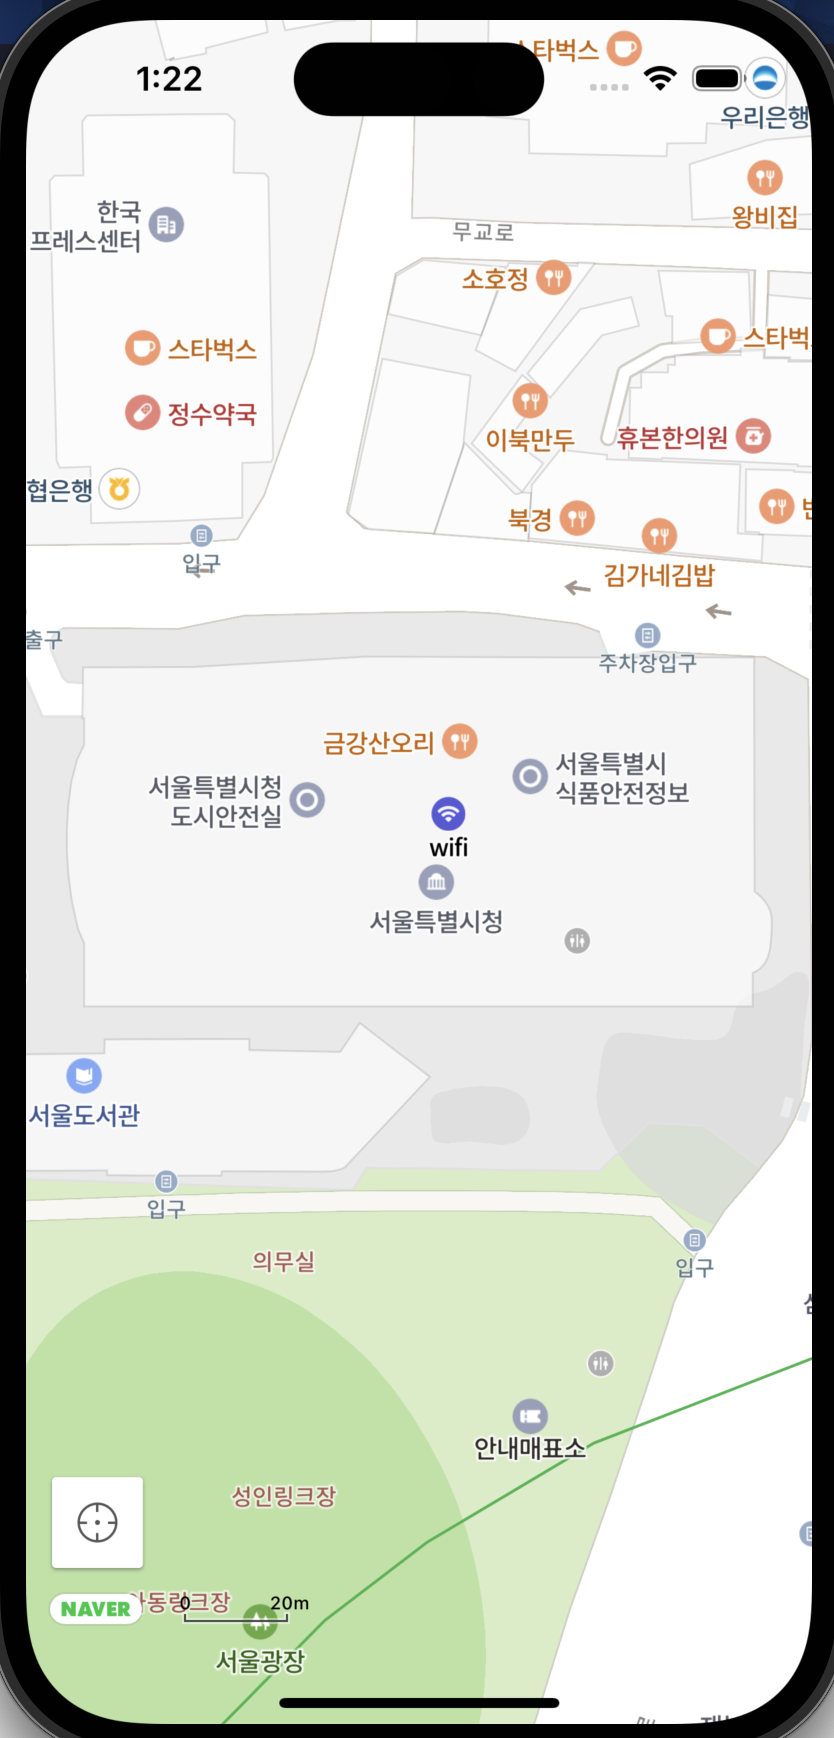
marker에 대한 것으로는 다양하게 사용을 해보았는데, NMFMarker에 들어가면 하나하나 설명이 되어 있습니다. 위와 같이 코드를 작성하게 되면, 아래와 같은 마커가 생성이 됩니다.

시청에 wifi 라는 Marker를 생성된 것을 볼 수 있습니다.
전체 코드
import SwiftUI
import NMapsMap
import CoreLocationUI

struct MapView: View {
    @State var coord: (Double, Double) = (37.5766905, 126.9769307)

    var body: some View {
        ZStack {
            UIMapView(coord: coord)
                .edgesIgnoringSafeArea(.vertical)
        }
    }
}


struct UIMapView: UIViewRepresentable {
    var locationManager = CLLocationManager()
    var coord: (Double, Double)

    func makeUIView(context: Context) -> NMFNaverMapView {
        let view = NMFNaverMapView()

        view.showZoomControls = false
        view.mapView.positionMode = .direction
        view.mapView.zoomLevel = 17
        view.showLocationButton = true

        locationManager.requestWhenInUseAuthorization()

        let marker = NMFMarker()
        marker.position = NMGLatLng(lat: 37.5666805, lng: 126.9784147)
        marker.iconImage = NMFOverlayImage(image: UIImage(systemName: "wifi.circle.fill")!)
        marker.captionText = "wifi"
        marker.iconTintColor = UIColor.systemIndigo
        marker.width = CGFloat(NMF_MARKER_SIZE_AUTO)
        marker.height = CGFloat(NMF_MARKER_SIZE_AUTO)
        marker.mapView = view.mapView

        return view
    }

    func updateUIView(_ uiView: NMFNaverMapView, context: Context) {
        let coord = NMGLatLng(lat: coord.0, lng: coord.1)
        let cameraUpdate = NMFCameraUpdate(scrollTo: coord)
        cameraUpdate.animation = .fly
        cameraUpdate.animationDuration = 1
        uiView.mapView.moveCamera(cameraUpdate)
    }
}

struct MapView_Previews: PreviewProvider {
    static var previews: some View {
        MapView()
    }
}'Language > Swift' 카테고리의 다른 글
| [Swift] Firebase Storage Xcode에 설치하기 (2) | 2022.10.15 |
|---|---|
| [swift] Pod? Cocoapod install & remove (0) | 2022.10.05 |
| [SwiftUI] UIViewRepresentable (0) | 2022.09.20 |
| [SwiftUI] Naver Map iOS install (0) | 2022.09.20 |
| [SwiftUI] Image (0) | 2022.09.15 |

포스팅이 좋았다면 "좋아요❤️" 또는 "구독👍🏻" 해주세요!
![[Swift] Firebase Storage Xcode에 설치하기](https://img1.daumcdn.net/thumb/R750x0/?scode=mtistory2&fname=https%3A%2F%2Fblog.kakaocdn.net%2Fdna%2FbDQQkw%2FbtrOCsBGrIf%2FAAAAAAAAAAAAAAAAAAAAAHxvTHv5YkSJOiWn0rJBd9nXIrL1febl_g-We6aTLqyP%2Fimg.png%3Fcredential%3DyqXZFxpELC7KVnFOS48ylbz2pIh7yKj8%26expires%3D1772290799%26allow_ip%3D%26allow_referer%3D%26signature%3DpRhlroxgf1v0FEdUCKxSq6oaapg%253D)
![[SwiftUI] UIViewRepresentable](https://img1.daumcdn.net/thumb/R750x0/?scode=mtistory2&fname=https%3A%2F%2Fblog.kakaocdn.net%2Fdna%2FSOMAr%2FbtrMxWkk9fl%2FAAAAAAAAAAAAAAAAAAAAAM_F5s6Ff4JzKHUO2CGdjGwlmzBQyy3KAVbr9qE0FPkc%2Fimg.gif%3Fcredential%3DyqXZFxpELC7KVnFOS48ylbz2pIh7yKj8%26expires%3D1772290799%26allow_ip%3D%26allow_referer%3D%26signature%3DiABbtbiKEiWdGDAgNXi7F6MhGwA%253D)
![[SwiftUI] Naver Map iOS install](https://img1.daumcdn.net/thumb/R750x0/?scode=mtistory2&fname=https%3A%2F%2Fblog.kakaocdn.net%2Fdna%2FcPB88E%2FbtrMzCY0y7s%2FAAAAAAAAAAAAAAAAAAAAAKLuvsUlV-hcD6PY2to_70jlSAXlW18lPyUNeh2kHd7d%2Fimg.png%3Fcredential%3DyqXZFxpELC7KVnFOS48ylbz2pIh7yKj8%26expires%3D1772290799%26allow_ip%3D%26allow_referer%3D%26signature%3DXzGTC9qn4K5iHmeEx%252Fpe7Wigw2I%253D)